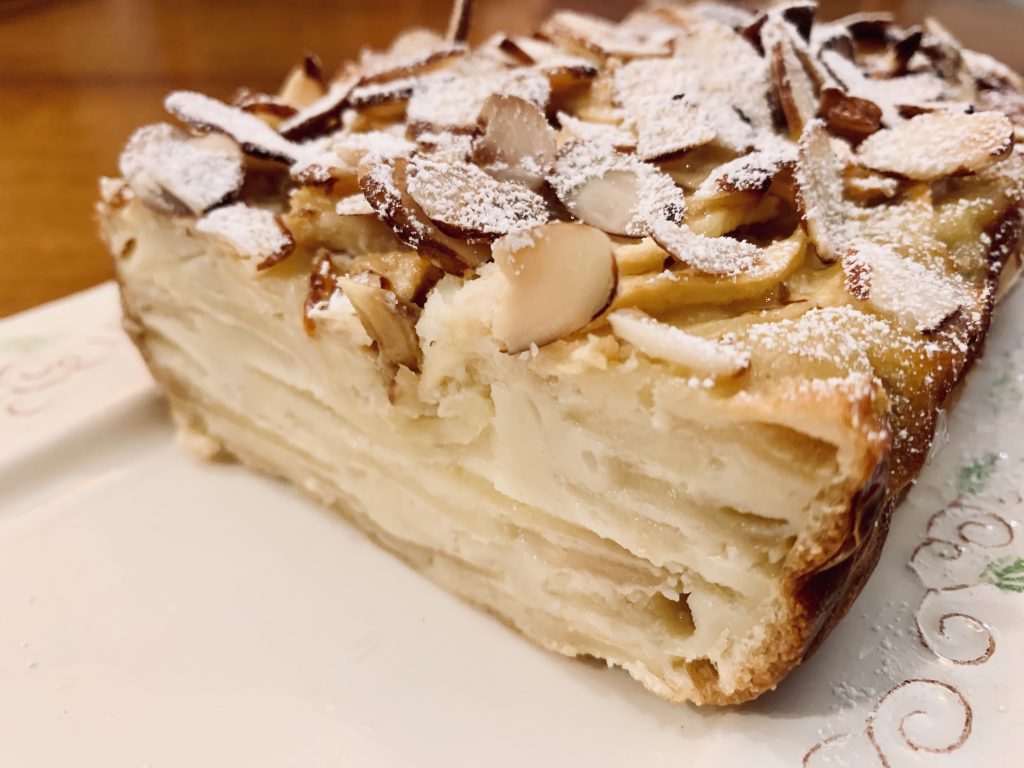
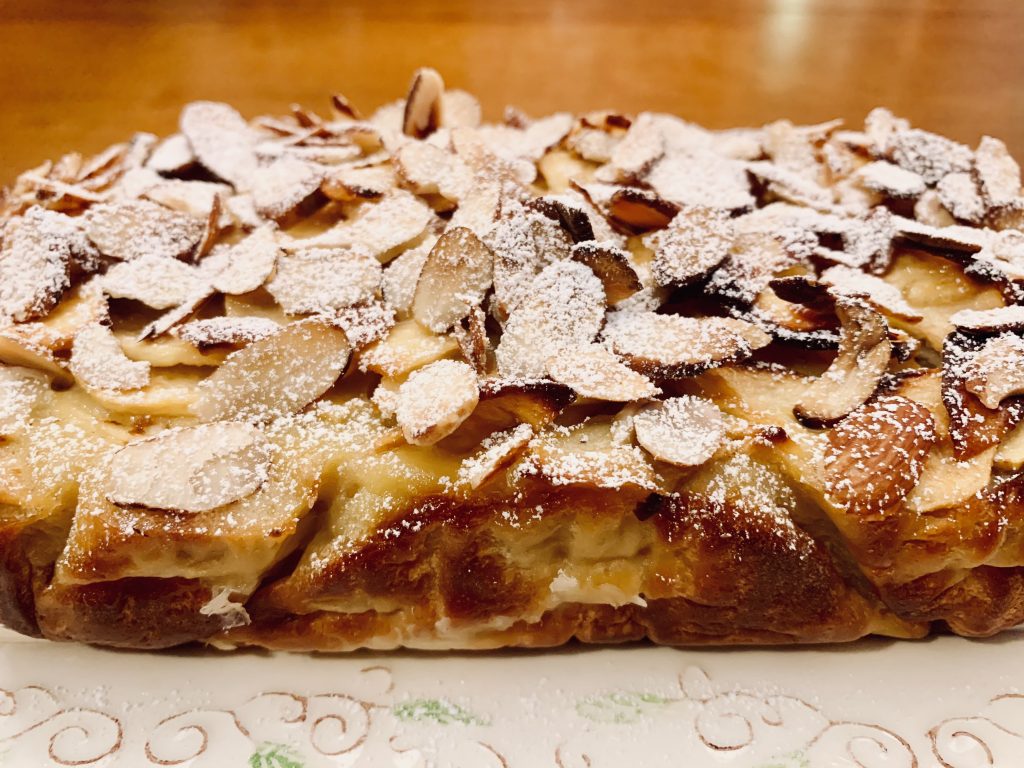
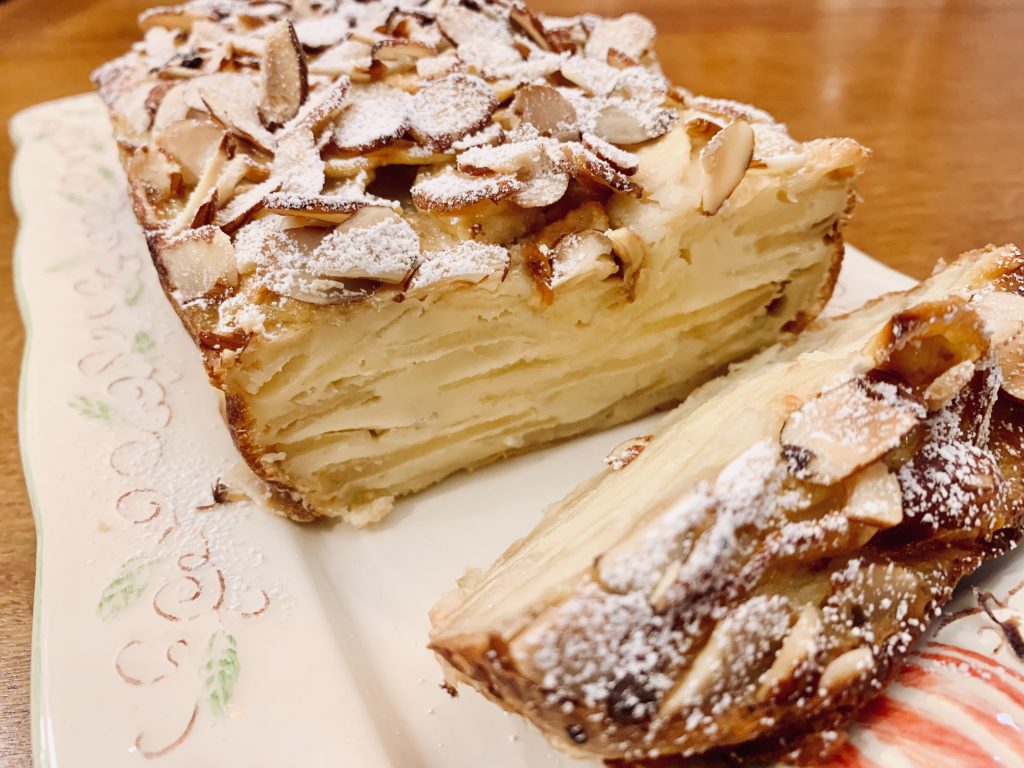
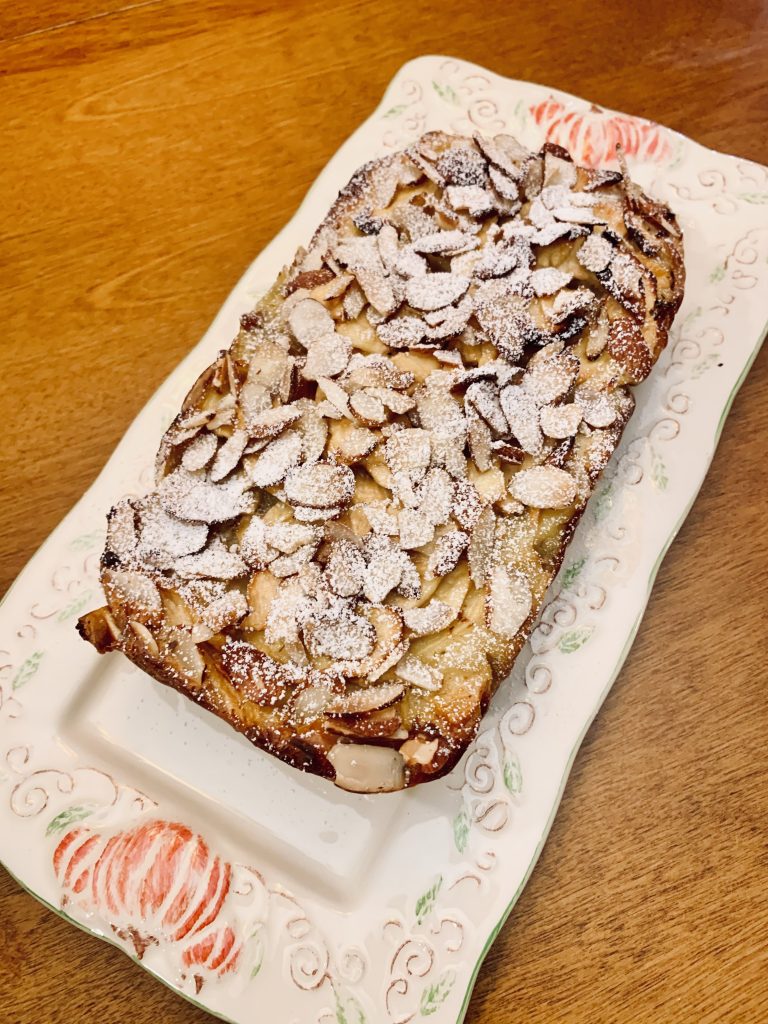
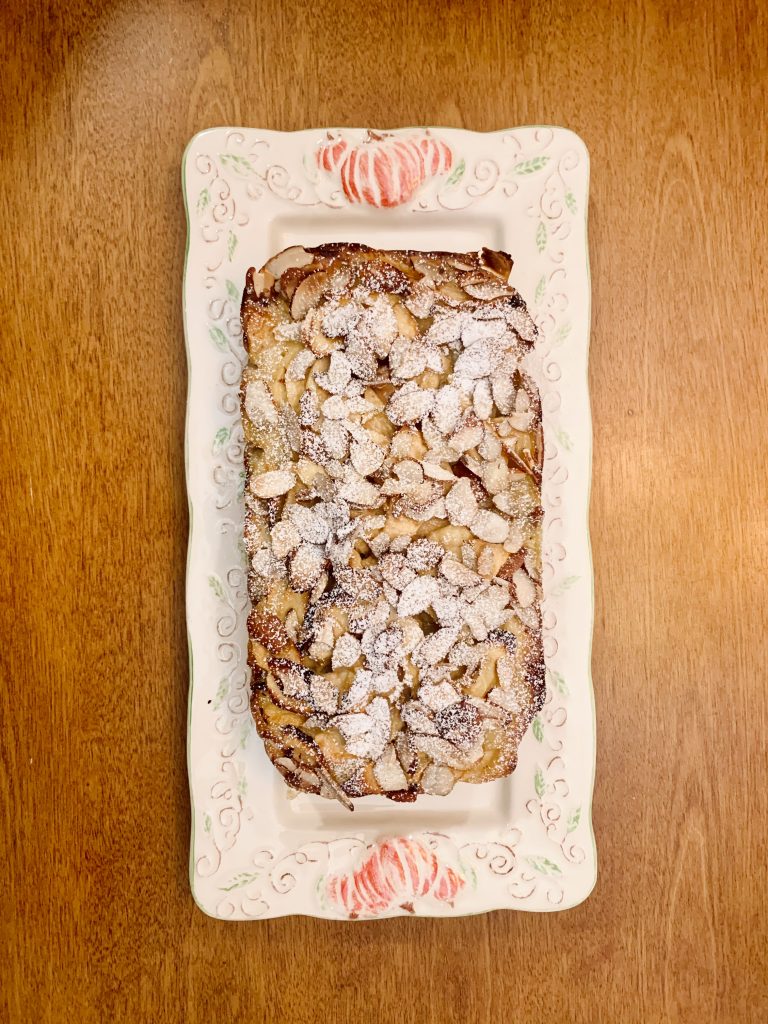
I pinned a recipe for this Invisible Apple Cake a few weeks ago because it looked pretty neat, and I was ready to try something new and different. And I certainly got all that.
Cutting all the apples thin was what took the longest, but in my opinion there’s almost something calming about it. Plus, I may have eaten just about every other slice I cut.
Next, I had to mix up some batter, coat the apples in it, lay them in the pan, and drizzle the rest of the batter over it. Pretty simple. The last thing I did before sticking it in the oven was sprinkling some sliced almonds on top.
In the end, this dessert wasn’t as good as I’d hoped. I guess that’s what you get for looking into healthier desserts…it’s the sugar and cream and butter that makes sweets so good. Honeycrisp apples probably would have been a better choice than the Gala that I used, since most of the sweetness comes from the fruit, but I don’t expect to be making this again. Nothing wrong with it, but it wasn’t anything extraordinary.
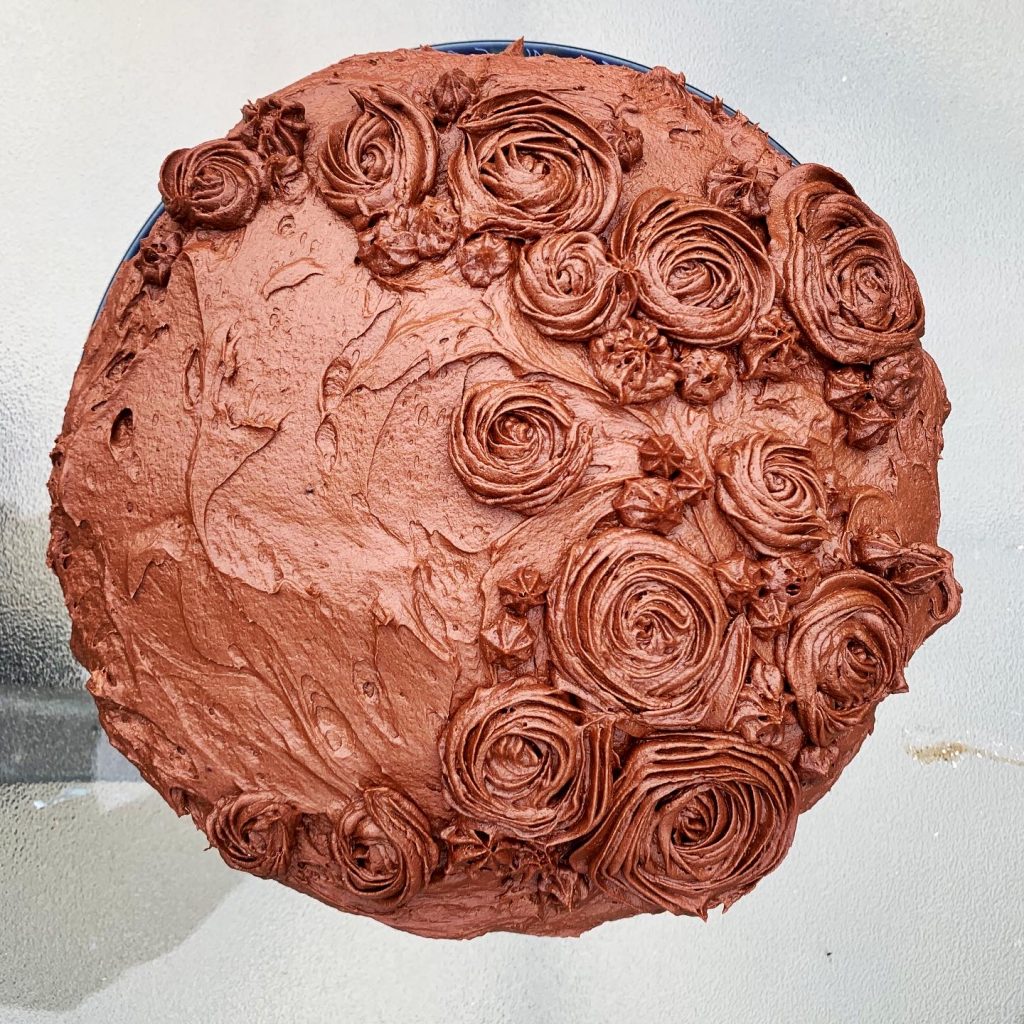
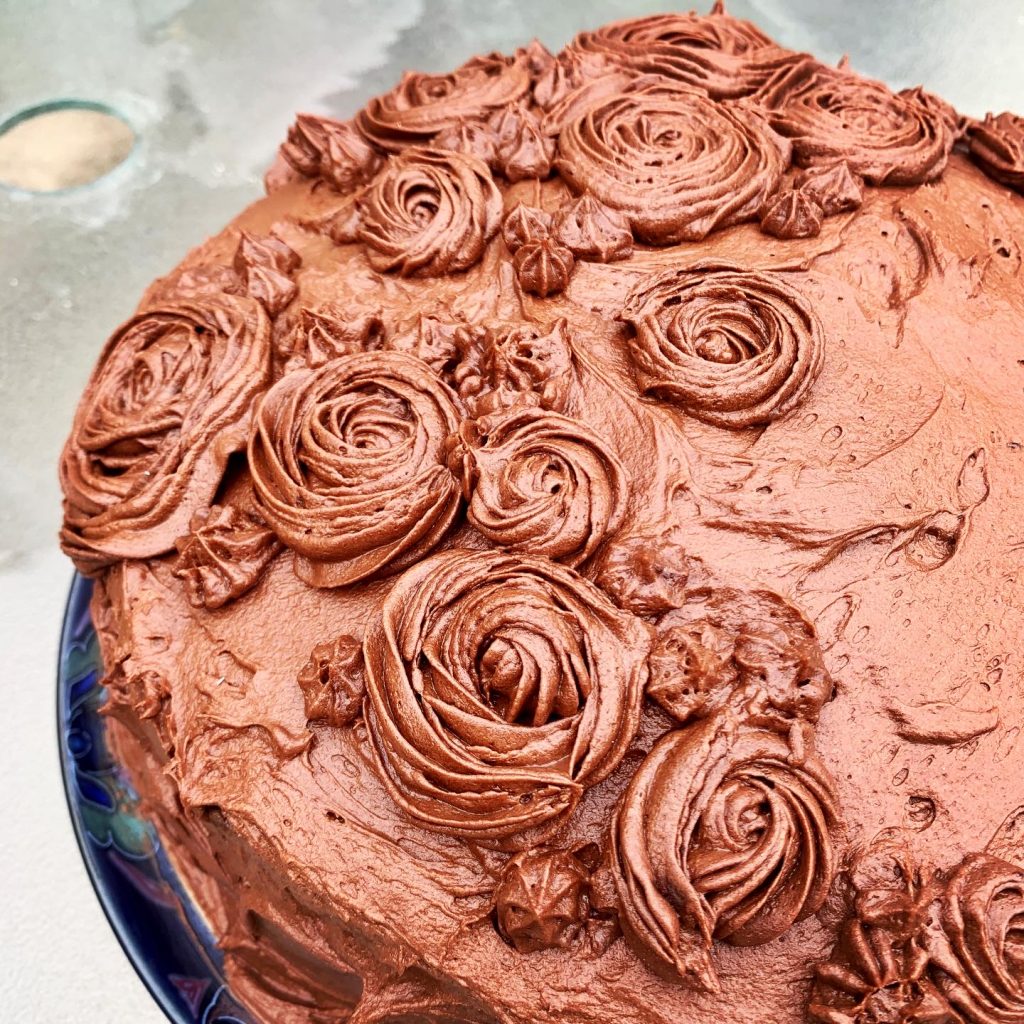
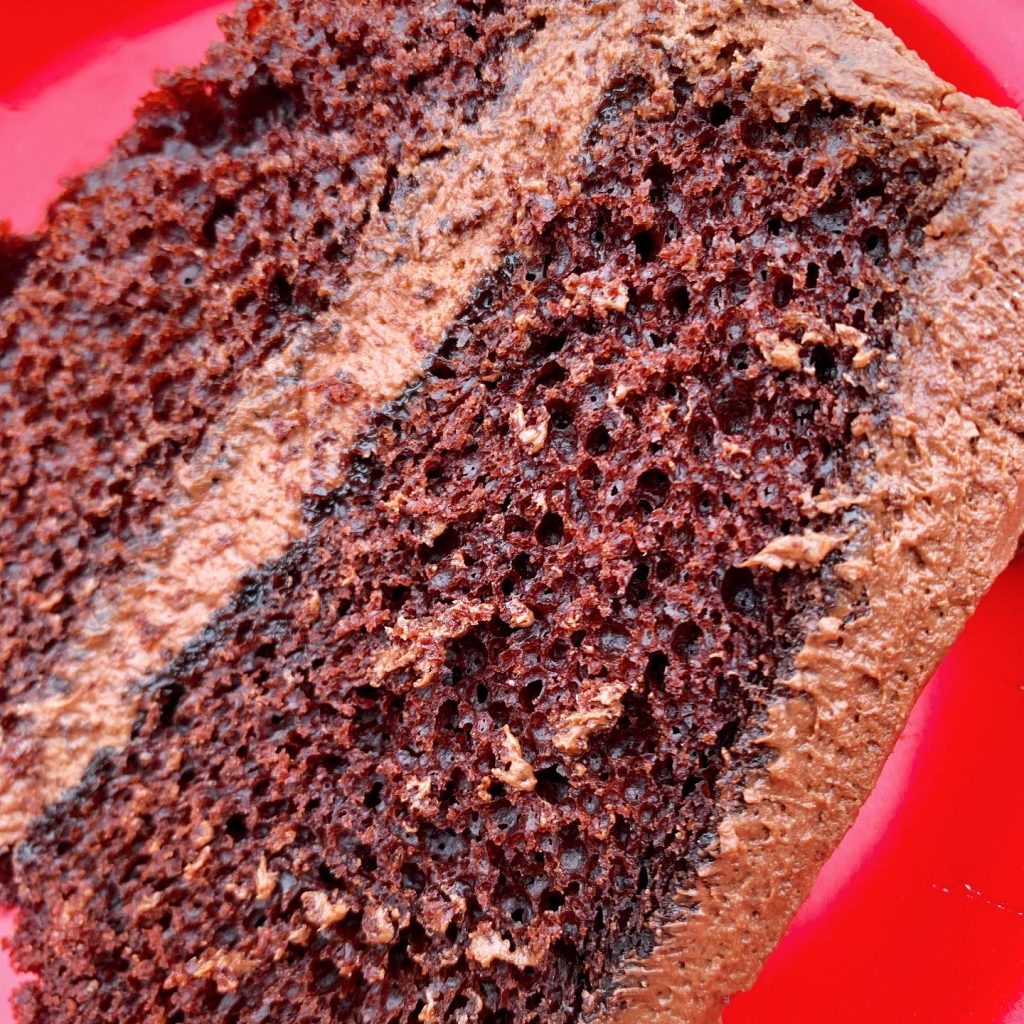
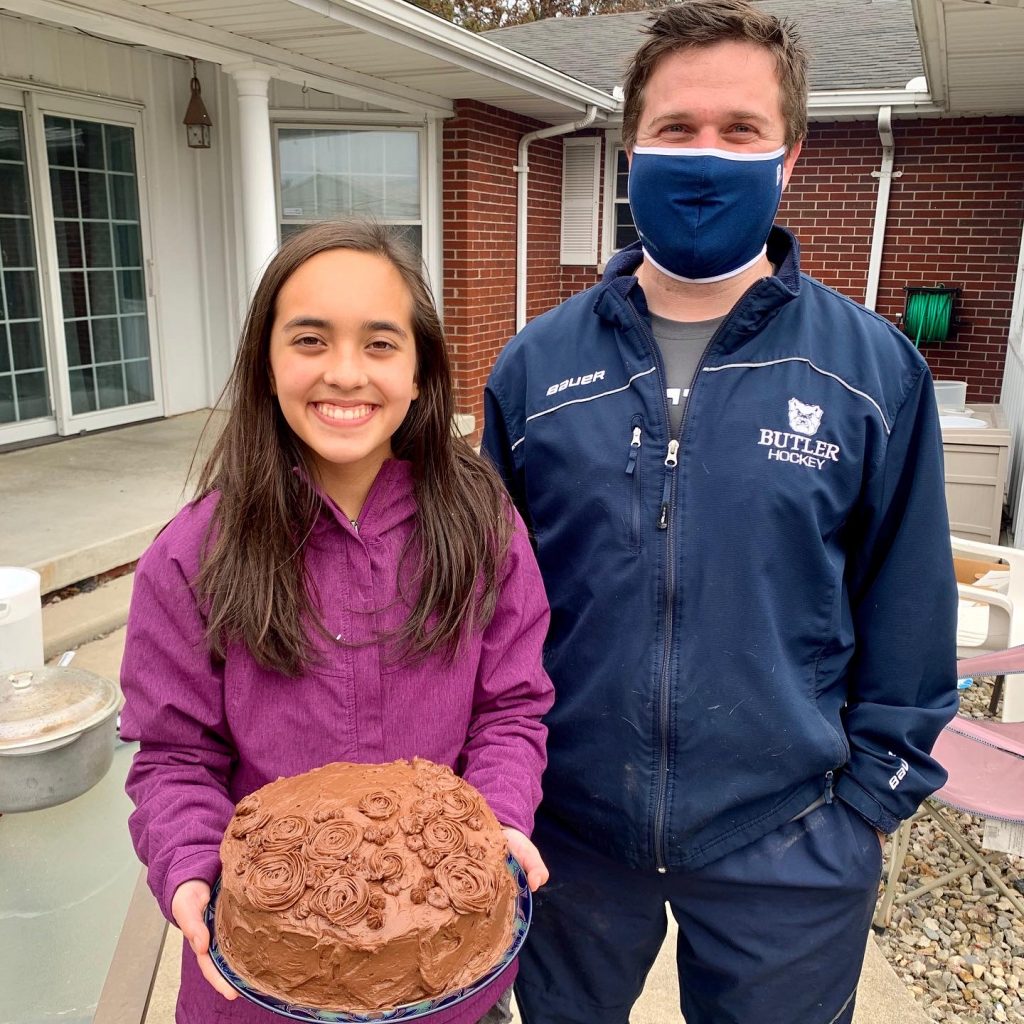
I know it’s been a while, but you can rest assured that I have not given up baking! I just made this chocolate cake for my uncle’s birthday.
This was actually my very first cake (other than carrot cake, but that was a very different process) and you’ll be surprised to hear that I didn’t have any mishaps along the way! I could hardly believe it myself. Everything went as planned and it all turned out pretty perfectly, if I do say so myself.
I found this lovely recipe on Add a Pinch, and will definitely be using it again in the future! Absolutely delicious!
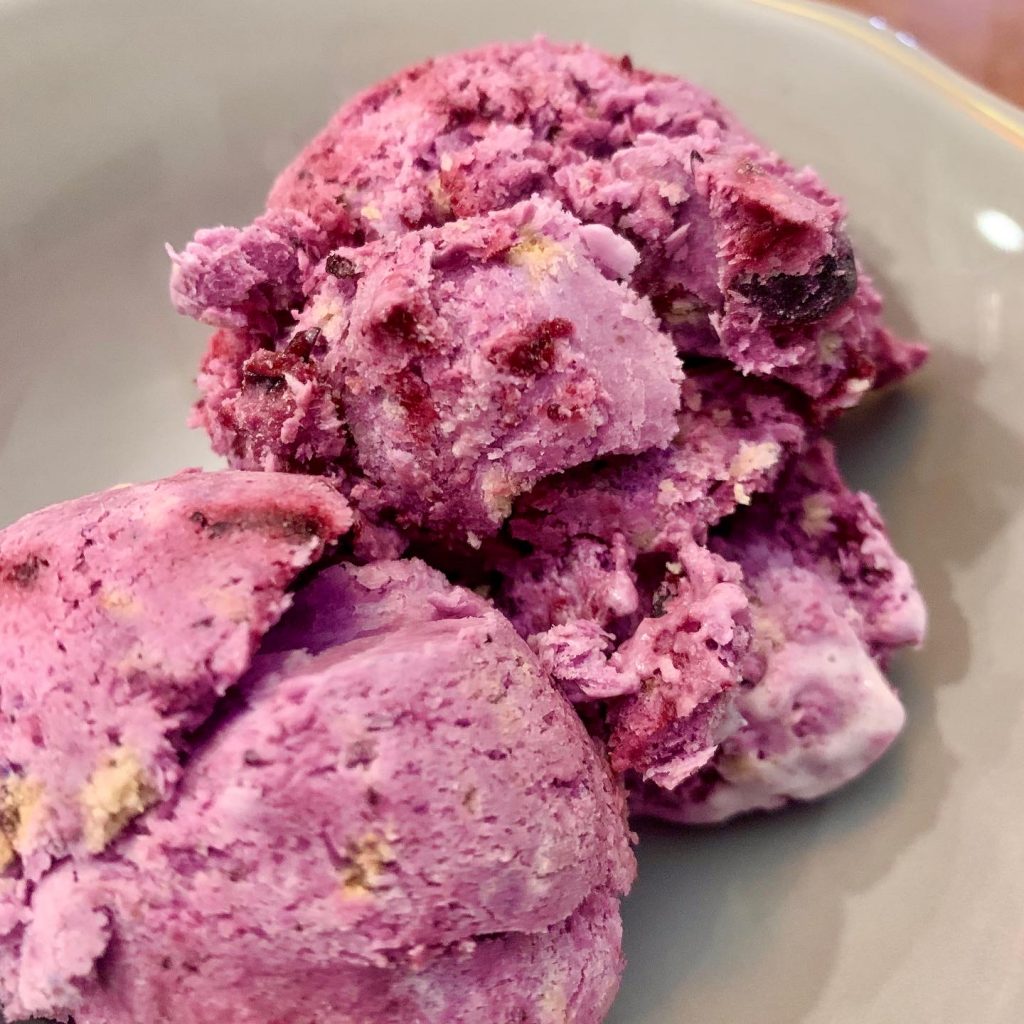
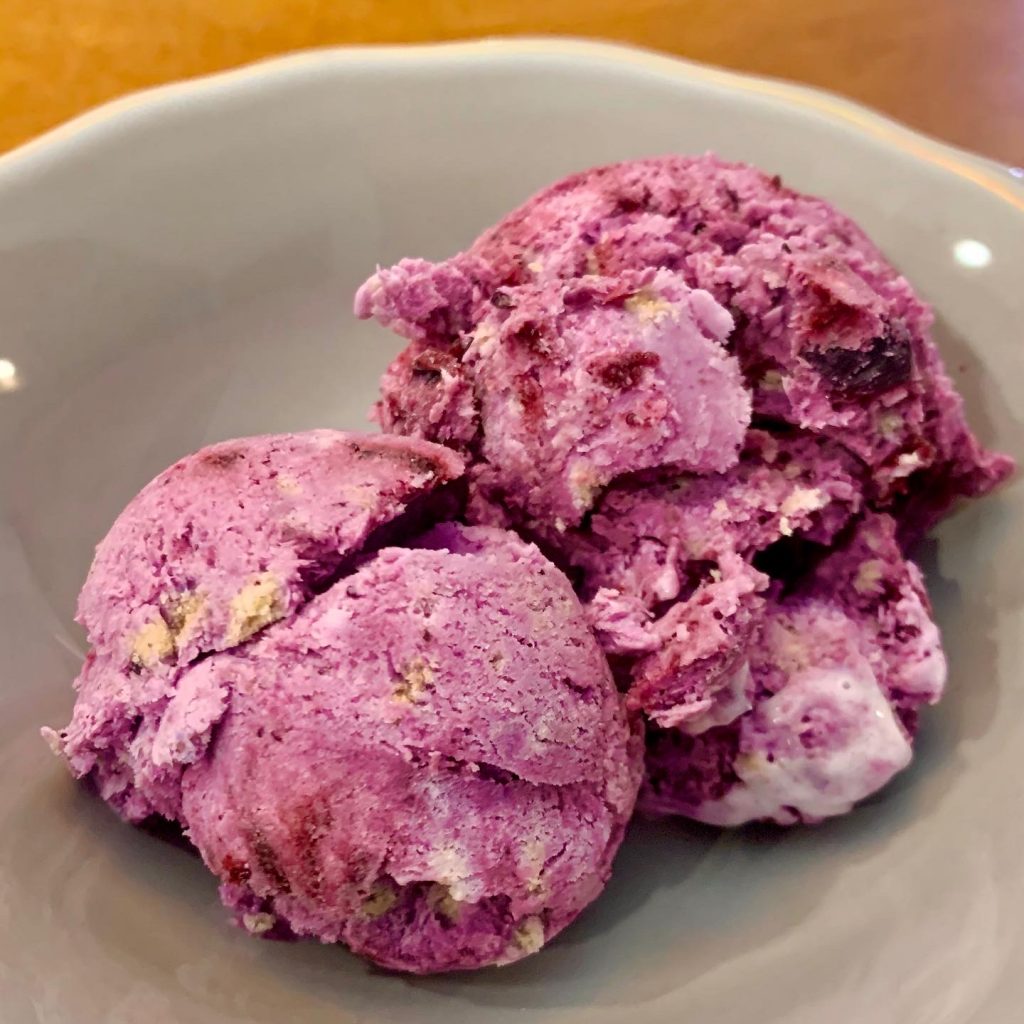
Not long after I made that strawberry cheesecake ice cream, my mom bought some blueberries at the grocery store. She came to me and asked, “Hey…could you make that ice cream again? With blueberries this time?” Of course, I was more than happy to, and here’s how it went!
I used the same basic cream base as last time, but the fruit was a completely different process. With all the changes I’ve made, I’d say this is pretty much my own recipe now. Remind me to post it in the near future!
We all agreed that when I made the strawberry ice cream, there was not nearly enough of it for our ice-cream-loving selves. So, this time I made a double batch.
Having so much ice cream did result in a couple of issues. The cream on its own list barely fit in the ice cream maker, meaning I had to mix the toppings in by hand afterward. When we ate it, it was clear that I didn’t do quite as good a job as the machine. There was way too much graham cracker at the top, but next to nothing in our last servings. The berry flavor was almost overpowering at the end, since so much of it had sunk down.
Ice cream is ice cream, so I couldn’t call it bad, but I do believe that there are some improvements I can make in the future. Mainly just making sure everything is stirred in evenly. Aside from that, it was pretty great! Like I mentioned earlier, I will be sharing this recipe sometime soon.
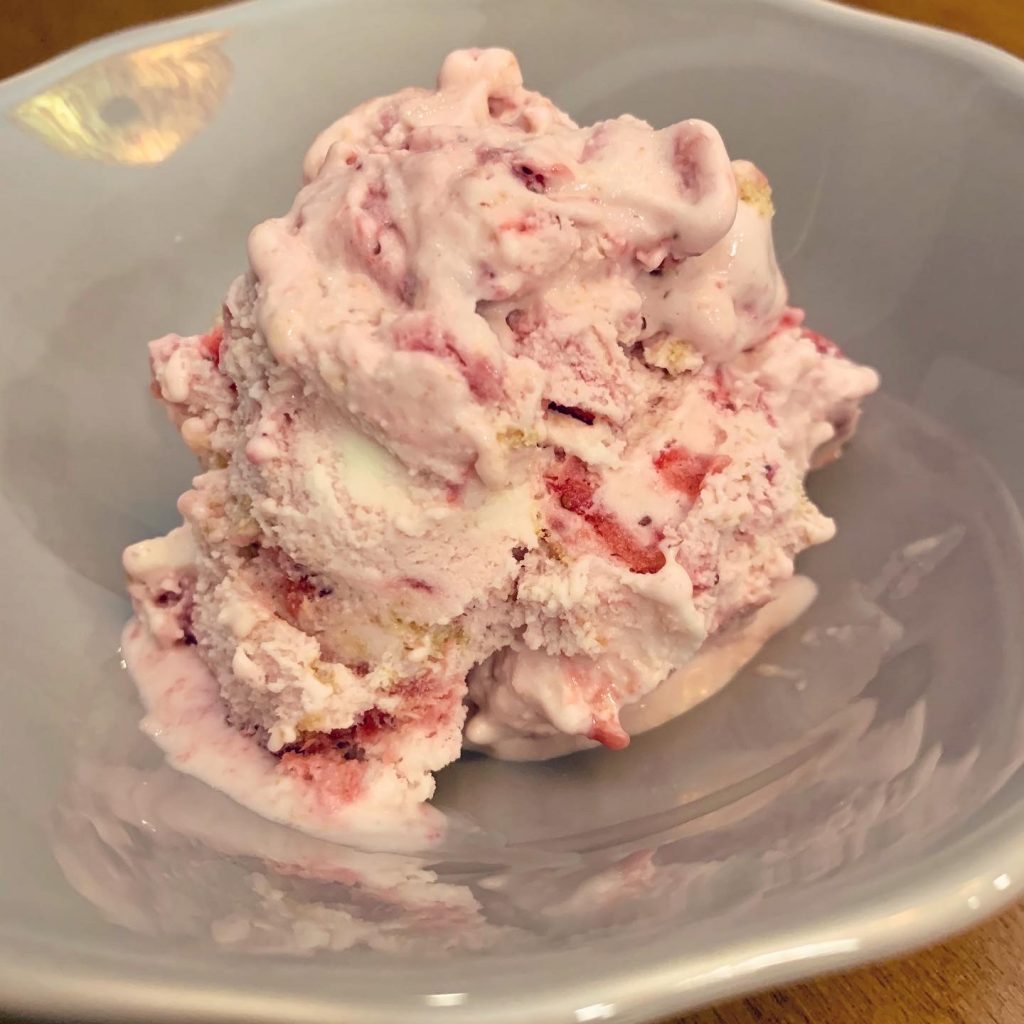
Yesterday was the last day of summer, and before it was over I had to cross one more thing off of my list.
Cheesecake ice cream.
I’ve been craving it since the spring—don’t ask why, because I have no idea myself. As a special last treat before we dive into what’s bound to be the craziest school year of my life (freshman year + all online, WHAT??), I decided to make some!
The original recipe is from Handle the Heat, but I made quite a few changes of my own. It came out AMAZING!
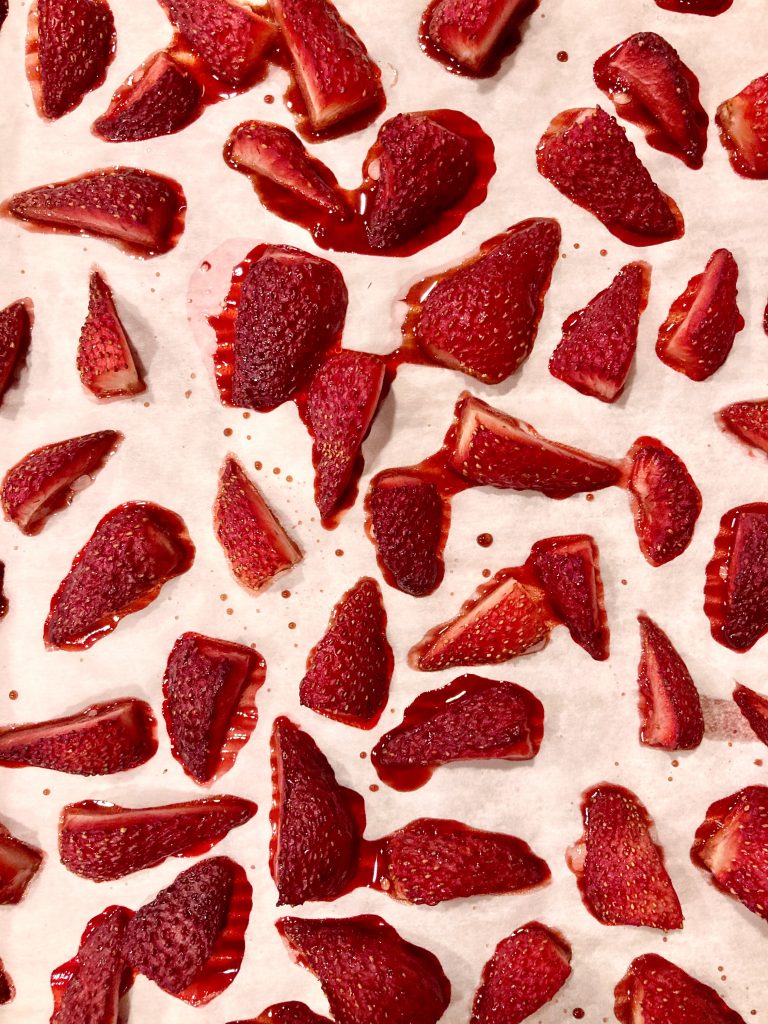
Roasting the strawberries is something I never would have thought of, but it such a great idea! They were soft and juicy and this really brought out the flavor. Just like an ice cream shop (except better)!
So, onto the things I changed:
Instead of using 3/4 cup of sugar, I reduced it to 1/4 cup and added in 1/4 cup of Stevia. It was still perfectly sweet—not missing anything!
I omitted the corn syrup, which was optional.
We didn’t have any whole milk, so I used 2% and added in a little bit extra heavy cream.
Neufchâtel cheese in place of cream cheese. It’s essentially the same thing.
We didn’t have any sea salt, but regular iodized salt didn’t make any difference.
Rather than chopping the graham crackers (in a blender, I assume), I crushed them with a spoon. This way there was a little more variety in the sizes of the crumbles.
When mixing the berries and graham crackers in at the end, I held back just about 1/4 of the stuff to stir in at the very end. That way, there was a sort of ribbon of toppings in addition to the ones that were evenly mixed in.
This ice cream made a perfect last-day-of-summer treat! I will definitely be making it again.
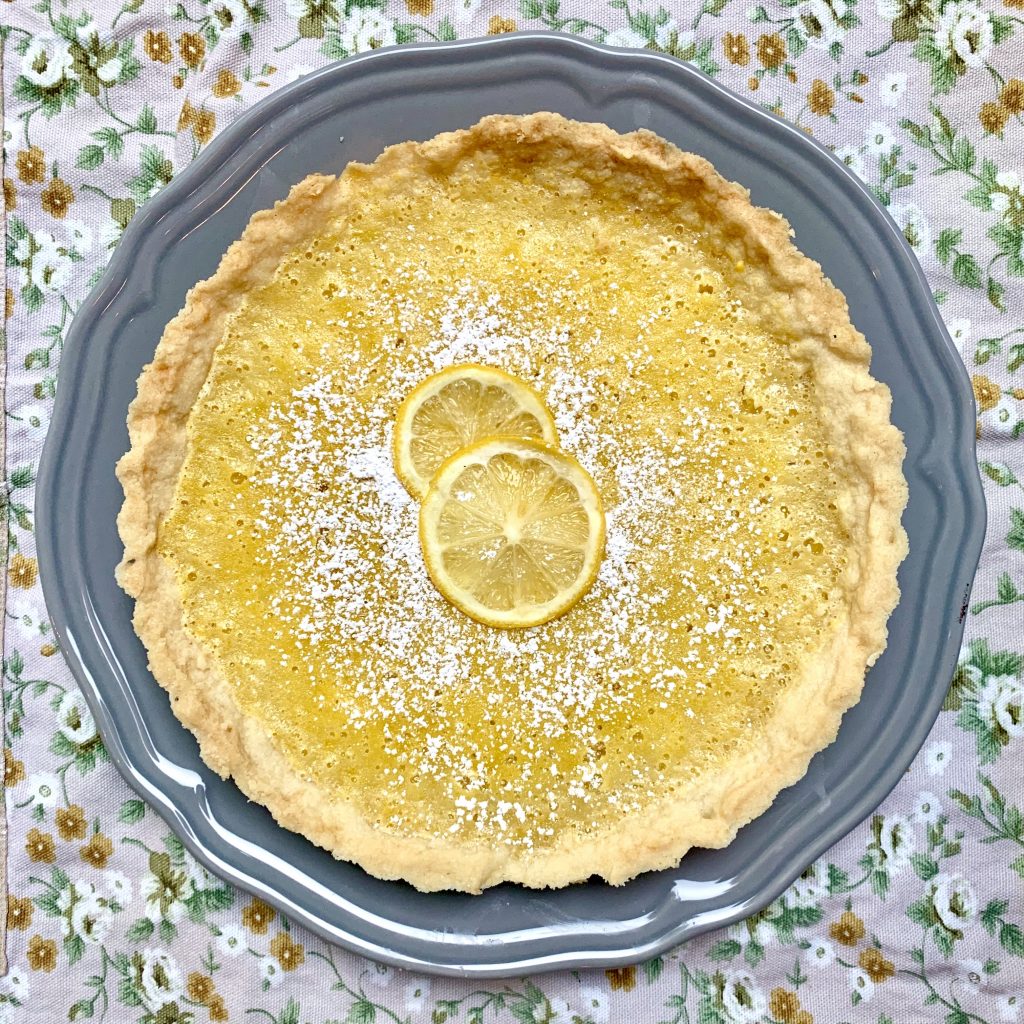
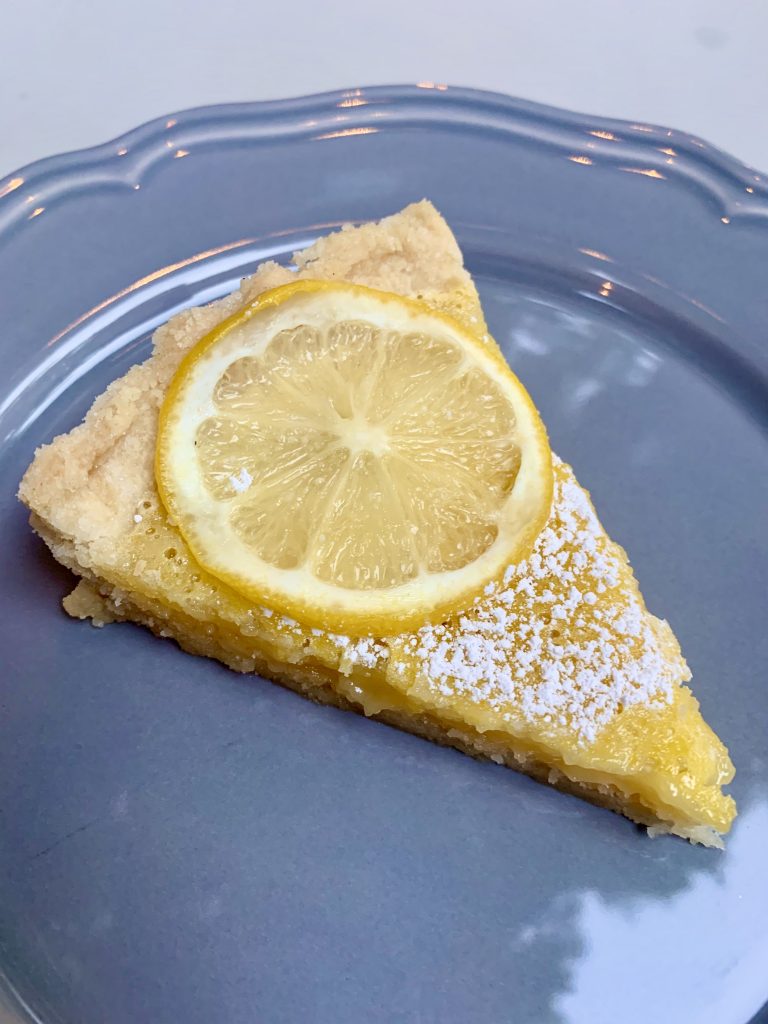
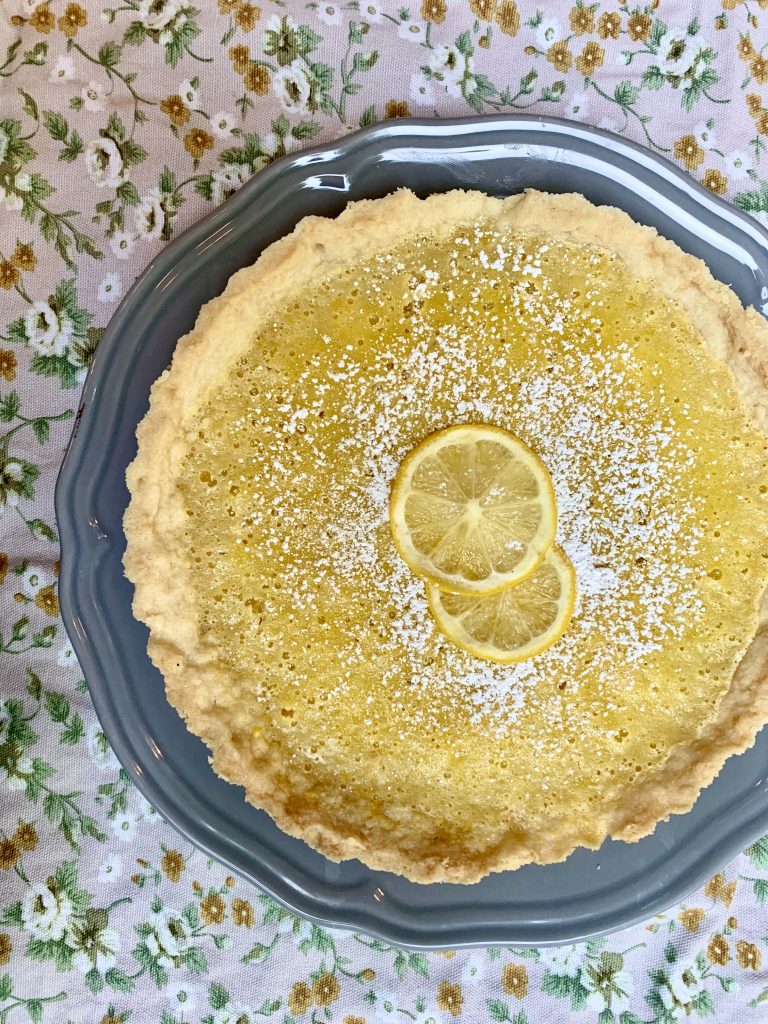
Everyone in my house loves lemon bars—especially my dad. They’re quick, easy, and delicious, so naturally they’ve become a pretty frequent dessert.
This time, I wanted to try something different. I got a tart pan for Christmas, which, as I’m sure you know by now, I love to use. So, I made a lemon bar tart—which sounds fancy, but is really just lemon bars made in a tart pan!
The tart turned out great, and I’m especially happy with the way it looked. I think that the thin lemon slices were definitely a good idea, and the dusting of powdered sugar was also a nice addition. I’ll be making this again for sure! (Even though the only thing that changed was the shape…haha!)
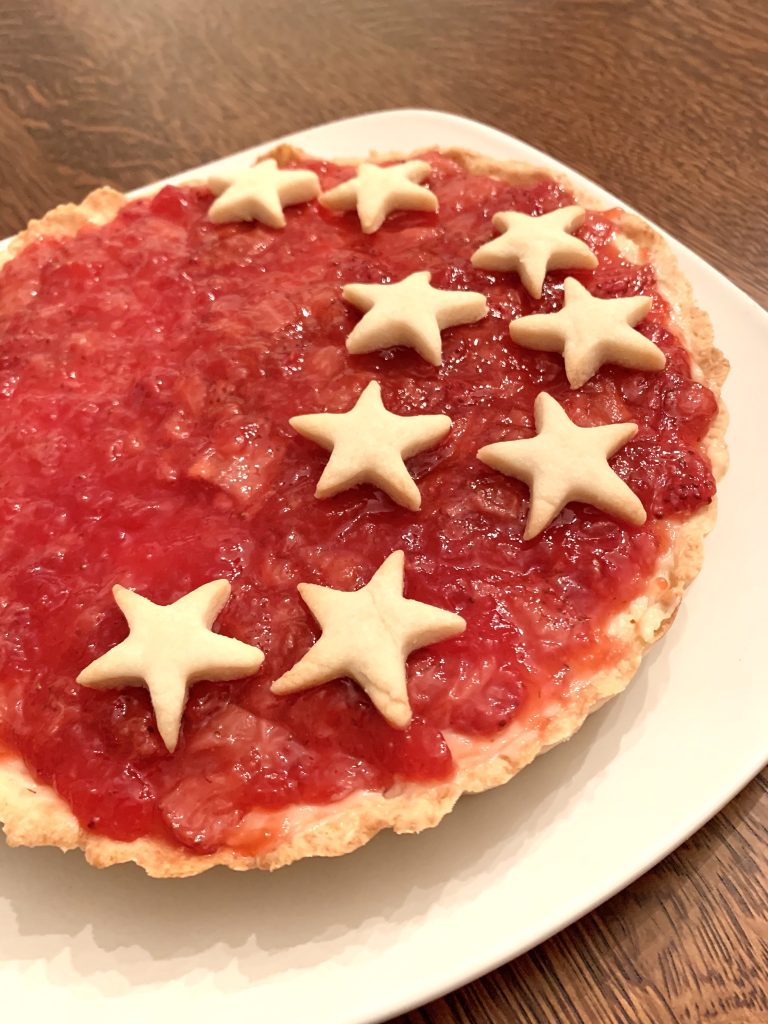
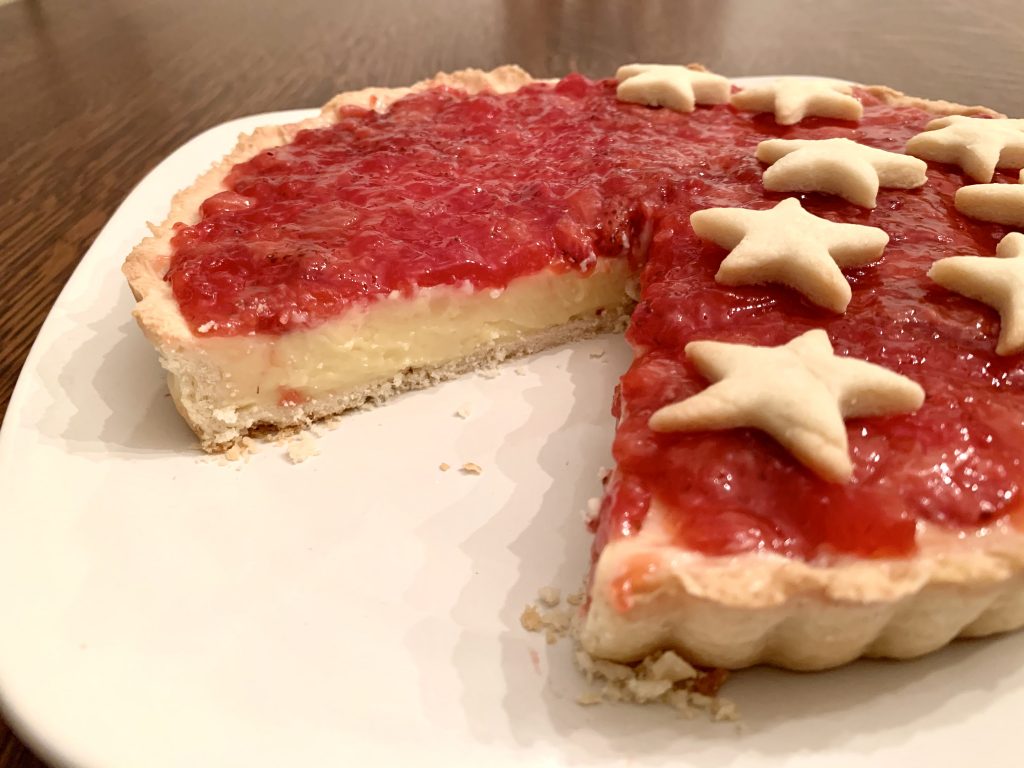
Tonight, I made a strawberry tart for dessert. I’ve used this recipe three times now, and it’s become one of my family’s favorites. The recipe is actually for a blueberry tart, but it works with other fruits, too! Each time I’ve made this, I’ve used a different fruit. The first time, I used blueberries, and then I made it again with blackberries, and this time it was strawberries. It’s been delicious every time!
I’ve definitely become faster with every time making this tart. The first night I tried it, I baked well into the night, and by then it was too late to eat it! We had to wait until the next day, which was certainly not what I had intended. Last time, I worked quicker, and today I made it faster than I’ve ever done before. Not to brag, but I must say I’m pretty proud of myself for that.
Before trying this recipe, I’m not sure I ever realized just how delicious custard is! In fact, I’m not quite sure I’d ever tried it at all. Whatever the case, I’m in love with it now! This recipe makes an especially thick and creamy custard/pastry cream, and it’s absolutely scrumptious. Maybe this is technically called a “berry tart”, but the custard is the real star of the show! When making this tart, I always end up with some leftover custard, but my family loves it so much that I’ve never reduced the recipe. We’re all more than happy to have an extra dollop on our slices!
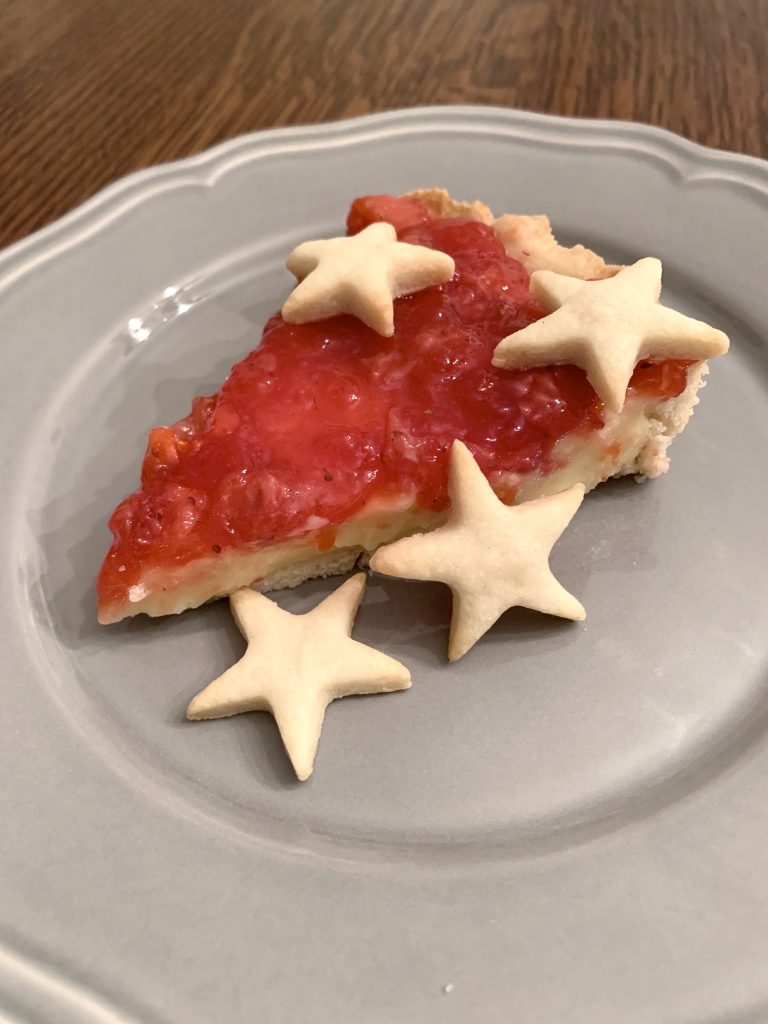
When using blackberries or strawberries instead of blueberries, I just substitute the berries and leave everything else exactly the same. This recipe calls for 200 grams of blueberries, which I’ve found can easily be replaced with 200 grams of any other berry. The funny thing is, we had such huge strawberries that it only took four! Those things were enormous!
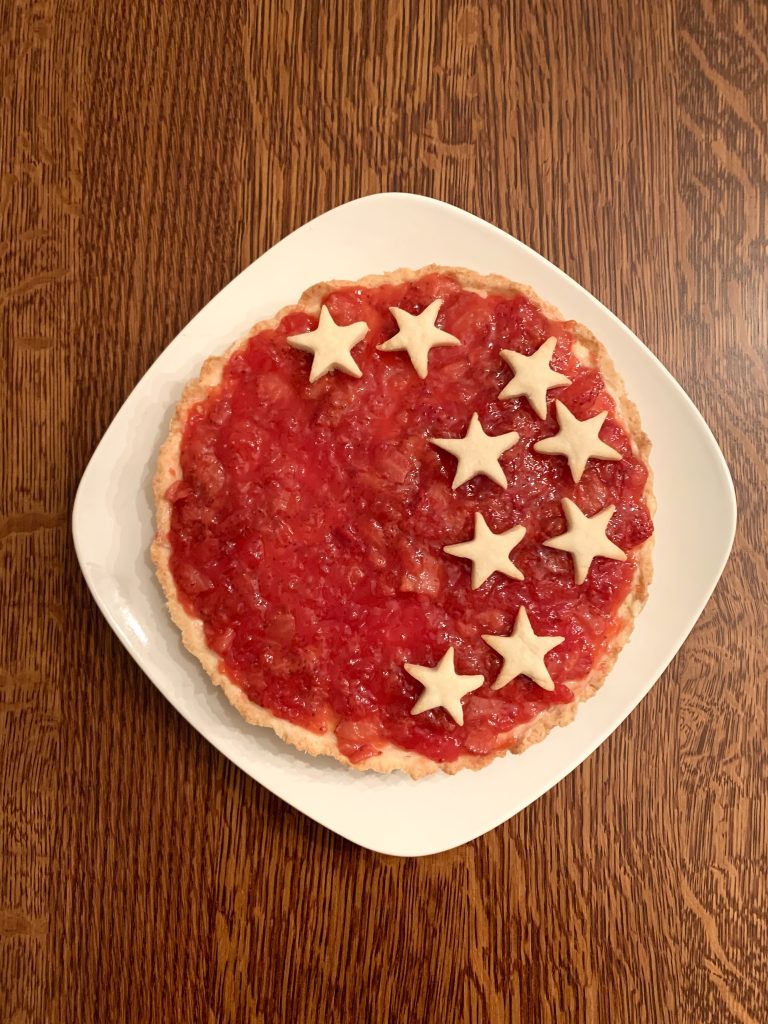
Last time I made this tart, I didn’t quite roll the dough out thin enough, so the bottom crust was too thick. There wasn’t any issue with the taste, but it meant the tart was shallower and the filling was harder to fit in. This time, I made sure to roll it out thinner, which resulted in quite a bit of extra dough. The crust of this tart is almost cookie-like, and it was my mom’s idea to make little cookies with what was left over. Originally, I had just planned on eating them, but after they baked, I had another idea. I realized that the little stars would actually make a really pretty decoration for the top of the tart! It was kind of a last-minute decision, but I think it was definitely a good one.
In my opinion, it came out quite pretty!
If you’re interested in trying this recipe, you can find it here.
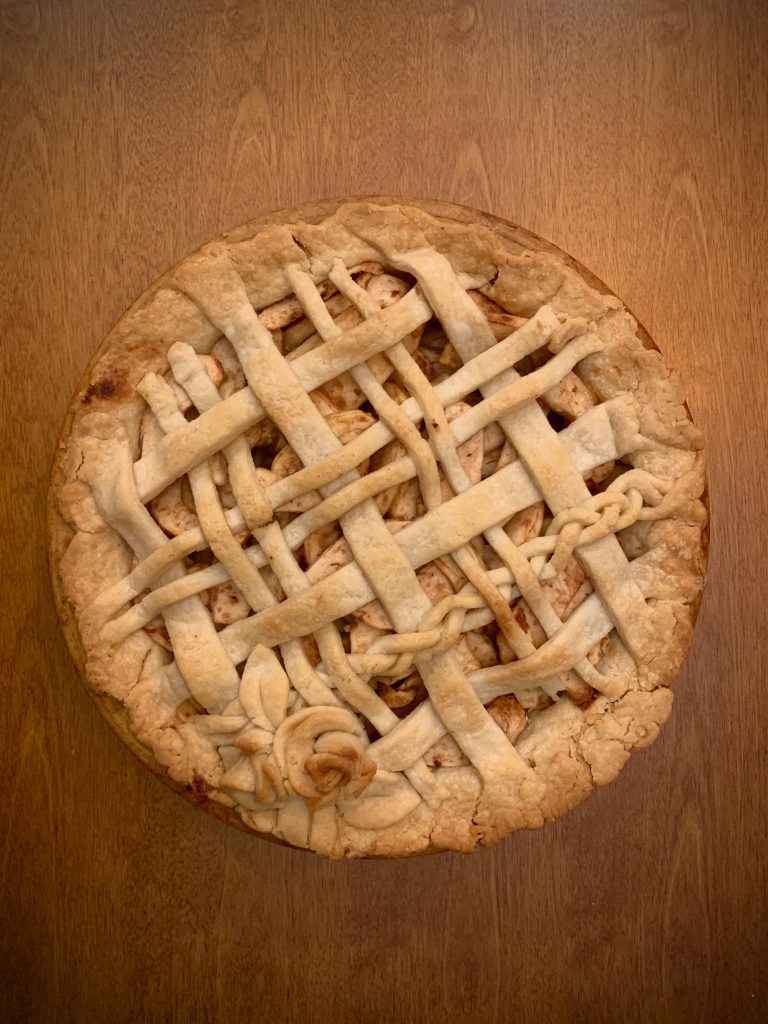
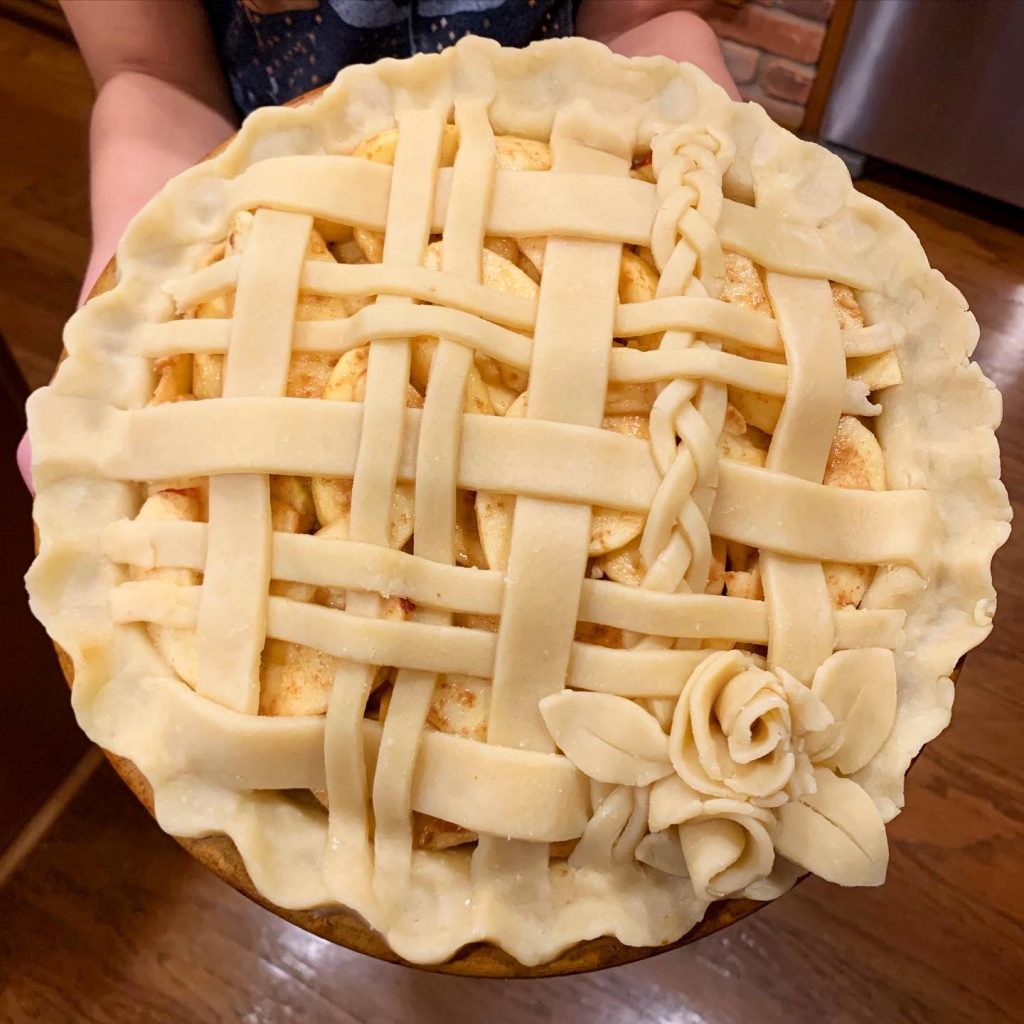
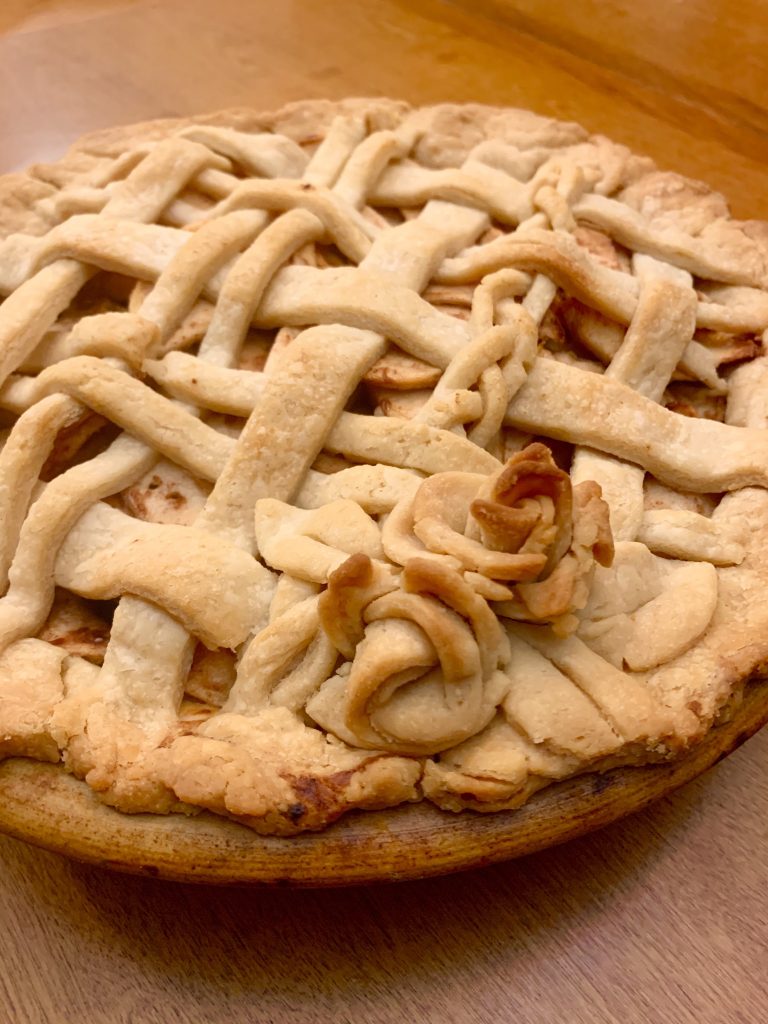
Last weekend, I made an apple pie. Usually, when I make pie, I top it was a “crumble crust”, as my family calls it—a sort of streusel topping. This time, I decided to try something new and attempted a lattice for the first time.
Once I had a basic idea of what to do, I was able to make some changes from the basic lattice and add my own touches. Weaving the strips together was actually surprisingly easy, as was the braiding. The hard part was trying to keep the strips from breaking as I worked with the small pieces, especially as the dough became more and more handled.
By the time I made it to the roses, the dough was very overworked and flaked apart at the lightest touch. Keeping the flowers from breaking was a very delicate process, but I managed to (slowly) get it done.
Every time I make pie, I like to roll up the extra bits of dough with cinnamon and sugar to make these little bite-sized morsels. It’s a trick that’s passed down through my family for years. Bake them for a few minutes, and they’re absolutely delicious. However, after doing the roses, the leftover dough wouldn’t even stick together! We had to make do with crumbles. Not as pretty, but they still tasted good.
Overall, I think that the pie looked pretty nice for my first time making a lattice. Just a tip, if you’re ever working with pie dough: be careful not to overwork it! I definitely learned my lesson, and I’ll be much more careful next time.